Toilet Swirls but Won’t Flush – Causes & Fixes
When you flush your toilet, the obvious expectation is that the water will rush from the toilet tank to the bowl, washing down the wastes in the bowl in the process. However, due to one issue or the other, toilets can’t flush effectively with some simply swirling the wastes around without flushing them down the drain.
If this is your problem, there are many causes to it including less water than is needed for a proper flush, a clog in the inlet valves, a clog in the P-valve, poor toilet location, clogged vents, poor venting, poor pipe sizes and many other reasons.
The solutions to this issue include adjusting the water level in the toilet tank, unclogging vents and pipes and changing the location of your toilet among others. It all depends on the issue at hand with some causes needing more skills and costs to fix than others.
Why your Toilet only Swirls but won’t Flush
To understand what causes a toilet not to flush, you need to understand how a toilet works in the first place. It’s actually a simple setup where water is stored in a tank above the toilet seat. This tank has a certain capacity that is supposed to be enough to completely wash away the wastes each time it’s flushed.
When you flush the toilet with the lever, the water rushes down a pipe using gravity. When it reaches the toilet bowl, it spreads out and flows into the bowl from a series of jets evenly spread out under the rim of the bowl. This ensures that water evenly flushes the wastes in the toilet bowl.
As the water fills up the toilet bowl, its weight forces it past the P-valve and into the drainage system. It’ll flow this way into the sewage.
Without enough water or with a clog impeding the free flow of this water and wastes, the toilet will act in certain ways all making the flushing process less efficient. In the current case, the toilet will swirl with water but won’t be enough to flush the toilet.
The most probable causes for this scenario and their solutions include the following:
Low water levels in the toilet tank
The amount of water in the toilet tank determines how effective the flushing process will be. In the toilet tank there are markings indicating the highest amount of water that is the best for the flushing process. If the water level is less than required, the flushing will not be effective and one such issue will be the swirling water in the bowl without proper flushing.
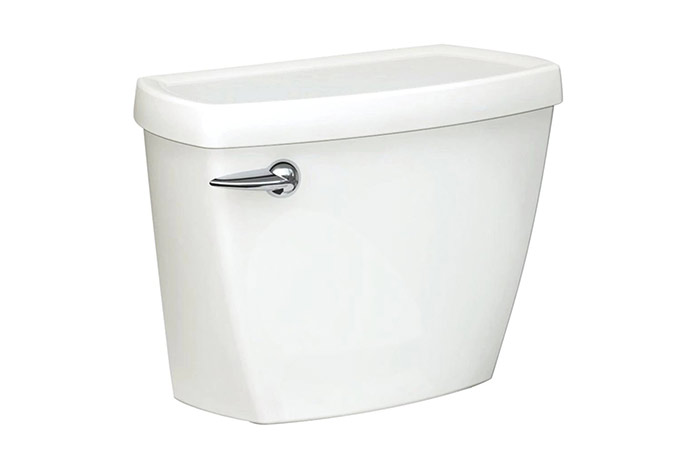
The water level in the toilet tank is determined by the float ball or a similar water level mechanism. When the float ball is set too low, the water level will be lower than the level marked in the tank. On the other hand, setting it too high can lead to an overflow of water in the tank. Getting the right level is our target.
Solution
The solution to this is setting the float ball at the right level to get just the right amount of water in the toilet tank. This is done as follows:
- Start by removing the lid from the toilet tank then set it aside.
- Without flushing the toilet, check the level of water in the toilet tank. The water needs to be just about an inch lower than the overflow tube. If the level is lower than that, this is the cause of your toilet not flushing as needed.
- Empty the toilet tank by first turning off the water at the mains with the shut valve then flushing the toilet until all the water in the tank (or as much of it) is gone.
- You can adjust the ball upwards to allow in more water by either bending the stem holding it to the handle upwards or using a screwdriver. The bending method only works when the stem is made of metal as plastic will only break. When using a screwdriver, the screw on the stem of the toilet ball is to be turned in a clockwise direction.
- At times, the ball might be damaged such that there is water inside of it. For such an issue, you only need to replace the float ball or other water level regulation system.
- Turn the water back on then check the level in the water tank. If it’s still lower than expected, raise it by repeating the procedure above. If too high, set it lower as needed.
The right amount of water in the toilet tank should solve your problem. If not, you need to try out the solutions below.
Further Reading: How to Adjust Toilet water level
Clogged drainpipe
The drainpipe is the pipe leading from the toilet bowl to the sewer. If it’s clogged, the water coming from the toilet bowl will find it hard finding its way to the sewer. If it’s not a complete blockage of the drainpipe, the water will slowly pass past the blockage into the sewer making the swirling motion.
Solution
The solution to a blocked drainpipe is as follows:
- Fill a bucket with water and ensure it’s a large enough bucket to fill the toilet bowl and some more.
- Steadily pour the water into the toilet bowl up to the rim of the toilet making sure it’s not overflowing.
- Use a plunger to plunge the toilet. If it works, the water will flow quickly into the drainpipe.
- If the plunging doesn’t unclog the drainpipe, use an auger to clear the clog in the pipe.
If these steps don’t work, you might need a plumber to deal with the clog in the drainpipe. This can occur when the clog is seated deep in the drainpipe or it’s a tough object to unclog with the methods above.
Clogged inlet valves
Inlet valves refer to the small holes under the toilet bowl where water comes from after leaving the toilet tank. These valves let in water at the same time and at a high speed to flush down the wastes from the bowl past the P-valve and into the drain.
When these valves are used for a while, they might get clogged either by dirt or mineral deposits. This limits the volume of water reaching the toilet ball at a single time since water will flow out from fewer jets. This often leads to the swirling effect where a little amount of water reaches the bowl but doesn’t have the volume and weight to flush the waste away.
Solution
The solutions to this issue include the following:
- Open the lid on the toilet tank to access the inside of the tank.
- Pour muriatic acid into the overflow tube then wait for 30 minutes. This is enough time for the acid to break down any deposits in the connection between the water cistern and the toilet bowl.
- Flush the toilet and check whether the jets are open.
If this doesn’t work or you prefer not to use the acid, use the following procedure:
- Heat vinegar then pour it until it fills up the overflow tube. The vinegar should heat to at least 120 degrees before being poured into the overflow tube. Don’t flush the toilet yet.
- With a wire or other suitable object, clear the ends of the holes from under the rim of the toilet bowl. You can use a wire coat hanger or paper clip for this task.
- You can flush the toilet after you’re doe cleaning the inlet vents.
To avoid the buildup of dirt and minerals on the inlet valves, use clean and soft water respectively. You can also use a water softener to prevent the buildup of chemicals.
Poor toilet location
In some cases, the toilets on the upper floors can work just fine while the ones on the lower floors and the basement can’t flush with enough power. In such a case, it’s usually due to the water in the basement lacking enough force to flush the wastes as compared to the water in the upper floors.
The fact that the mains water will be supplied from the ground level can diminish the pressure of the water on the lower floors while the upper floors enjoy the increased height of the water making them better at flushing and general water pressure.
There is also the opposite case whereby water from a tank located at the top of the building causes the water pressure on the lower floors to be higher than the one at the top floors. Such cases can lead to the toilets in the upper floors having less power in flushing while the lower ones have good flushing power.
Solution
The solution to this problem can be a tough one to implement although having tanks installed to increase the volume of the affected toilets is the solution. If, for example, the toilet can’t flush properly, increasing the size of the toilet tank gives it more power for flushing hence making them better at it.
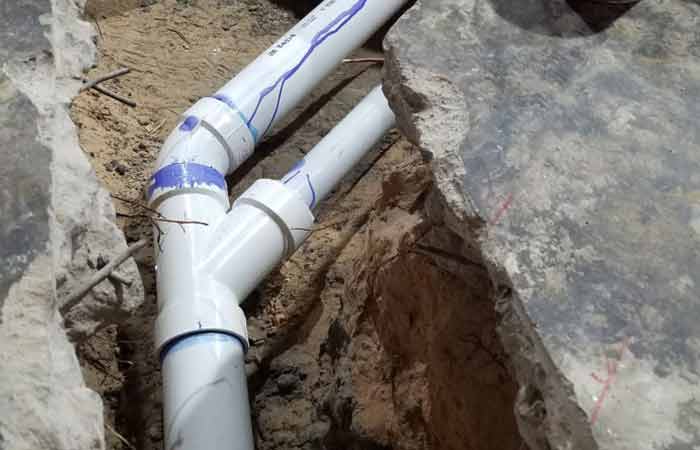
Poorly-sized pipes
When the pipes from below the P-valve to the sewer are smaller than the recommended size, the flushing will be an issue given that they’ll receive more volume than they should handle. This will make the flushing process slow with the swirling effect being noted after flushing.
Solution
The solution to poorly-sized pipes is simply installing pipes with the recommended sizes in your area. This is a task to be undertaken by a qualified plumber as it can be extensive and cumbersome for a DIY project.
Poor venting
Poor venting refers to a lack of proper way for the toilet system to equalize the pressure in the pipes with that of the atmosphere. Without a dedicated venting system, the toilet becomes a closed system which won’t allow substances to flow freely.
Solution
A toilet without proper venting needs to be vented as required by the law. There are various ways to vent a toilet including using an air admittance valve, pipes going through the roof and others deemed appropriate. These are tasks to most likely leave to an expert as they can be quite extensive.
Malfunctioning flapper
The flapper regulates water between the toilet tank and bowl by sealing the tank’s outlet. When closed, water remains in the upper part of the tank. When you flush the toilet, the flapper is lifted up to allow water to rush to the bowl.
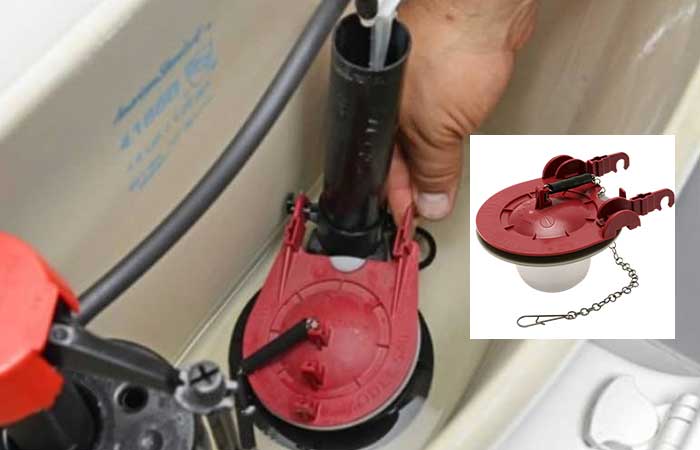
When malfunctioning by either being damaged or being stuck, the flapper can limit the amount of water reaching the toilet bowl at a single time. At times, the chain connecting the flapper to the flush lever is stuck.
Solution
If the chain is stuck, you should unentangle it to restore normal functioning. A damaged or faulty flapper only needs to be replaced with a good one. The procedure for replacing a flapper is as follows:
- Turn off the water at the shutoff valve.
- Empty the toilet tank by flushing it and drying out the remaining water with a piece of cloth.
- Remove the flapper valve from the toilet.
- Prepare the new flapper for installation.
- Install the new flapper.
- Turn on the water at the shutoff valve then test the new flapper.
This should fix the issue for you and restore the normal functioning of the toilet.
Further Reading;