Leaking Toilet Fill Valve from Top & Bottom: Causes & Fixes
A leaky toilet fill valve is a common problem in most dual flush and single flush toilets, and several factors can cause it.
A toilet fill valve can leak either from the top or bottom due to stuck parts, debris in the valve, damaged valve parts, misalignment, loose valve parts, wearing out of parts, and water pressure issues.
The following is a detailed discussion of why your fill valve is leaking, how to identify, fix it, and tips to prevent future leaks.
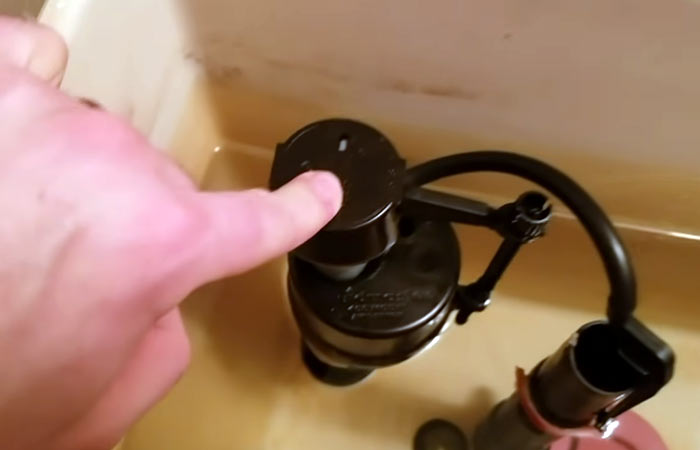
Toilet Fill Valve Leaking from Top
Most fill valve leaks are usually at the top section. Following are the causes and possible solutions.
Debris
The mechanisms of the fill valve are extremely sensitive to the quality of the water that flows into and out of the toilet cistern. If there is debris or dirt in it, it can easily cause a clog, which can cause the closing mechanism to malfunction, allowing water to flow into the tank even when it is supposed to be full.
Mineral deposits on the valve can clog the valve over time, resulting in clogging. This is common in regions where water is hard and contains a lot of minerals, especially calcium.
These minerals accumulate until they obstruct the seal’s ability to close, resulting in water leakage when the closing valve is supposed to be closed.
Luckily, this is usually an easy problem that you can fix yourself as guided below, based on what is causing it
If you diagnosed that the valve clog is a result of debris in the water you can fix it by cleaning manually removing the dirt and cleaning the parts with plenty of water while scrubbing with an old toothbrush taking care not to damage any parts.
In case of leaking as a result of mineral blockage you can clean the valve parts using water while scrubbing with an old toothbrush then flush with clean water.
Another method for removing mineral clogs, especially those that aren’t visible, is to remove the affected fill valve parts and soak them in vinegar solution or citric acid solution to dissolve calcium and other minerals, then flush them with water and reinstall them.
If the fill valve still leaks after assembly, you’ll need to replace it in its entirety.
Stuck Parts
Sometimes the moving parts of the fill valve can get stuck for whatever reason, in most cases due to presence of debris and dirt or mineral accumulation as explained earlier.
Sticking of parts leads to the valve not closing fully or not closing at all thus leading to continuously filling of the tank with the water leaking out through the overflow tube.
You can’t easily fix a problem due to sticking by simply loosening or if it only fixes the problem for a while then you have to remove the fill valve, disassemble it, clean it then reassemble and install it again.
Water Pressure Issues
One of the most common causes of leaking toilet fill valves is excessive water pressure. When the delicate components that open and close a fill valve are subjected to excessive pressure, they eventually give way and begin to leak.
Sometimes the pressure of water from the supply can be too high, especially in places where the toilet water supply is connected directly to the mainstream water supply source which in most cases has high pressure
You can fix a high water pressure issue in several ways:
- Installing pressure relief valves (PRV) – Installation of these valves allows you to control pipe pressure within the valve’s operating range.
- Installing diffusers- Because there are no moving parts, it is possible to control the pressure range for a fixed value.
- Providing knock-out drums or any other intermediate storage that is open to the air to reduce pressure and thus allow gravity and atmospheric pressure to moderate the water pressure.
- Installing vents in the water supply line
Adjustment Problems
Sometimes, a fill valve that allows water to rise above the normal level is not a leak. It could be the result of an adjustment issue. The fill valve can be set to allow the water level to rise to the overflow tube level. This issue is easily resolved by making a few adjustments as needed depending on the type of fill valve you have.
How you adjust a fill valve depends on what type of fill valve you have. Most new valve designs are made easy to adjust because they have an adjustable mechanism that you can rotate either clockwise or anticlockwise to raise or lower the water level.
In case of a leakage, you can adjust the water level and lower a little bit most conveniently an inch below the overflow tube level.
You can twist the lever arm a little to lower it on older designs that use a float ball on a lever, but this is only possible on metallic lever arms.
If the float ball is plastic or not bendable, you can lower the water level by unscrewing it and allowing it to extend a little and prevent the water level from rising above a certain point.
Misalignment of Parts
Sometimes the fill valve parts can get misaligned either by themselves or maybe as a result of tampering with, by someone.
In case of misalignment, you can easily fix it without having to take much trouble because all you have to do is make a few adjustments as necessary to get things back in place.
Broken Float
Damage or breakage of the float whether a ball or cup type affects its buoyancy, causing it to malfunction, allowing water in the tank to rise above its normal level.
This is because breakage of the float device affects its buoyancy as water seeps in displacing air and thus the whole mechanism cannot effectively close well to prevent constant water inflow, after the tank has filled to its normal level.
Depending on the nature of the damage, you can either repair it or have to replace the whole mechanism.
To fix a broken cup you can use silicone adhesive or any waterproof adhesive after emptying the float.
Leaking Toilet Fill Valve from Bottom
Your toilet fill valve leaking from the bottom could be caused by a number of factors, which are discussed below, as well as how to fix them :
Loose Lock-nut
A toilet fill valve can only leak from the bottom in one place, and that is at the fitting where it connects to the toilet tank.
A toilet fill valve is connected to the toilet tank via a compression fitting at the toilet tank’s bottom, which is secured by a lock nut under the toilet tank, where the water supply hose also connects to the tank.
A silicone or rubber seal prevents water from leaking out of the tank. Leaks are likely if the compression fittings become loose and water and water directly leaks to the toilet floor.
Loosening of the nut could be a result of faulty installation or just a result of external tampering.
In case you identify the problem to be a loose lock nut you can quickly fix it by following a few simple steps as follows:
- Turn off the water supply valve to prevent further flow of water into the tank then take off the lid of the tank and place it in a safe place.
- Flush the toilet to empty the tank then dry the remaining water using a sponge, old towel or absorbent piece of cloth and then disconnect the water supply hose from the tank.
- Hold the fill valve from the bottom to prevent it from moving around, then using an adjustable wrench or plumbing pliers, tighten the lock nut by rotating it further clockwise making sure not to apply excess force as you might break the parts or damage the seal.
- Reattach the water supply hose to the tank then turn back the water supply to fill the tank.
- Inspect the lock nut joint for any leaks and if some leaking still continues, repeat the above steps and tighten the lock nut further then fill the tank with water to confirm whether leaking still continues.
- If the work is satisfactory, that is, if the leaking no longer continues, fit the toilet lid back to finalize
Damaged or Worn-out Rubber Washer
Another cause for a toilet fill valve leaking from the bottom is the presence of a damaged or worn-out rubber washer.
A rubber washer is used at the joint where the fill valve attaches to the toilet tank to ensure a watertight seal and tightening of the lock nut beneath the tank presses the parts together creating a perfect seal
The rubber washer can become damaged or wear out over time thus malfunctioning and leading to water leakage.
Damage to the rubber washer could occur as a result of tampering, degradation from the rubber’s reaction with chemicals in the tank water or could simply be wearing out due to time.
Regardless of the cause, the only remedy for a damaged rubber washer is replacement with a new one which is a simple DIY task as illustrated below:
- Turn off the water supply valve to prevent further flow of water to the tank then take off the lid and place it aside at a safe place.
- Flush the tank to empty the tank then use a sponge, old towel or a piece of cloth to dry off the remaining water.
- Disconnect the water supply hose from the tank
- Unscrew the lock nut with an adjustable wrench or plumbing pliers while holding the bottom of the fill valve with the other hand to prevent it from moving.
- Lift the fill valve from its place and detach the old rubber washer from the fill valve then attach the fill valve back to place.
- Screw the lock nut back to place while holding the bottom of the fill valve to keep it in place and tighten properly. Make sure not to use excess force as it might lead to breakage or damage of parts.
- Once everything is in check turn on the water supply
Other Causes of Fill Valve Leaks
Broken Parts
Fill valve parts are mainly made out of plastic and brass. While both materials are quite durable as they do little work, they eventually wear out and will often break.
While plastic parts will become brittle and break off, brass parts tend to rust due to the minerals in the water and also break off in the end.
Regardless of the cause of the breakage and its nature, a damaged fill valve should be replaced with a new one as long as it leaks
This is because trying to fix a broken fill valve can affect its normal performance especially if it was on a sensitive part and can be time-consuming and laborious.
Faulty fill valve
Sometimes a fill valve can come with factory defects that compromise its performance. For example, a fill valve can come with a broken stem or with incompatible parts thus leading to leaking.
In such a case, you should replace it with a new one. Luckily, most companies give long warranty periods thus you can return the fill valve and get a replacement in case you notice defects on one.
Tips to Prevent Leaks
Always use clean water to prevent blockage of valve parts as a result of debris or dirt accumulation on valve parts as explained earlier. You can also install a water filter at any point on the water inlet line to prevent any dirt from reaching the tank.
In areas with hard water, you can use water softeners to prevent problems with parts as a result of mineral deposit accumulation on the fill valve or other parts.
You should always be careful while working on the fill valve or other components in the cistern to avoid damage to parts mostly using tools. Sometimes you can accidentally inflict damage to a crucial part of the fill valve which can consequently lead to malfunction, especially leakage
Avoid using harsh chemicals in the tank – Some cleaning chemicals that are put in the tank react with components of the valve especially the rubber parts thus degrading them and affecting their functionality.
Replace the fill valve after a while – Most fill valve manufacturers and other experts recommend that you Should replace the fill valve after every five to seven years depending on the brand to enhance efficiency.
Toilet Leaks: Further Reading