How to Remove a Shower Head-Stuck, Won’t Unscrew & Glued
Removing your shower head is an important task, especially when you are doing a replacement or an upgrade, routine cleaning, unclogging or performing regular repairs.
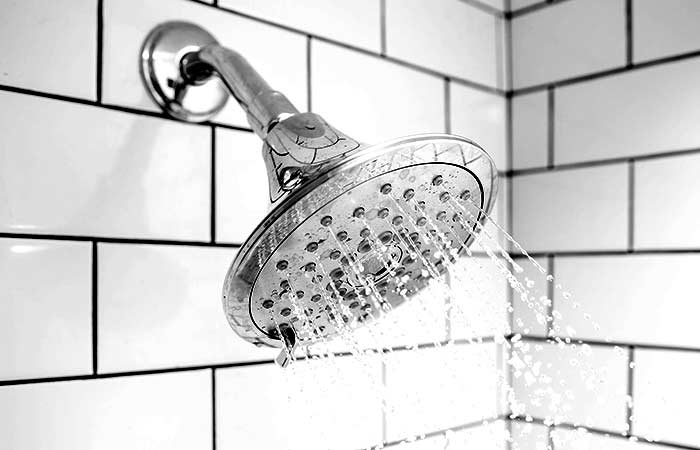
To remove a regular shower head, turn off the water then use your hands to unscrew it from the threaded end of the shower arm or pipe. You can also use an adjustable wrench to untighten some shower head designs.
If it is an old shower head that is stuck and won’t come off, use a penetrating lubricant or rust, calcium, and lime remover to loosen it and make it easier to remove.
Read on to learn more about the various shower head removal techniques plus tips to make the whole process of removing easier in the future.
Unscrew by Hand or with a Wrench
Shower heads are designed to be easily installed and removed by simply screwing them on and off the shower head arm. Some of the tools you need are an adjustable wrench, pair of pliers, and a plastic bag/tarp. Below are the steps.
- Turn off the water supply to your shower. While most shower fixtures have a handle that disconnects water flow to the shower head, turning off the water supply is generally a good safety measure especially if you are not used to this kind of plumbing project
- Place a plastic bag or tarp in the shower pan beneath the shower head. This will catch any stray metal or rust shavings.
- With one hand, grip the shower head, turn counterclockwise to unscrew, and remove the old shower head. If you need more leverage, hold the shower arm with your other hand as you turn. (Take caution not to bend or move the shower arm.)
- Use a wrench or a pair of pliers if your hands cannot unscrew the shower head.
- Wrap a piece of plumber’s tape around the jaws of your wrench or plier/ a piece of old cloth on the connector to prevent them from digging into or scratching the connector nut or shower arm finish. Even if you intend to dispose of the shower head, the tape will keep the wrench from biting off rust or metal shavings, which could cause a smear in your bathroom.
- Tighten the wrench or pliers around the connection and turn counterclockwise to unscrew the nut. Take care not to twist the pipe in the wall. Turn the shower head by hand if necessary, while holding the connecting pipe with soft-jaw pliers or just a piece of cloth.
- Once you’ve got the shower head moving freely or loosely enough, place the tools aside and finish unscrewing it by hand.
How to Remove Stuck Old Shower Head that Won’t Unscrew
Aged shower heads that have not been removed for some time can be stuck and hard to unscrew especially with your hands.
Shower heads become stuck because of rust, calcium, and other hard minerals which accumulate around the connectors over time and form a hardened seal. A shower head can also be stuck be it was fitted too tightly during the previous installation or replacement.
Stuck connections can be frustrating to deal with. A wrench or a pair of pliers are enough to loosen a mildly stuck shower head but if these tools don’t work but can lubricate it or loosen the mineral deposits with the remedies below:
Lubricate
If you’re still having trouble removing your shower head, try spraying a lubricant like WD40 on the connectors to make the removal easier. Spray it in, then wait ten minutes before wiggling the connector back and forth to see if it has any give. This will help to move the lubricant around and enable the showerhead to unscrew gradually.
Using Vinegar
You can soak your shower head in a vinegar bath if it is stuck on. This will aid in dissolving some of the minerals and rust so you can remove it.
- Fill a plastic sandwich bag with a vinegar solution, wrap it around the showerhead, especially the connector, and secure it to the shower arm with rubber bands.
- Allow it to react for at least 2 hours before removing the plastic bag and attempting to unscrew the shower head by hand or using the methods described earlier.
- After removing the old shower head, clean any leftover plumber’s tape or residue from the shower pipe threads.
Use a Calcium, Lime, & Rust Remover
If chemicals are more your style, you can also use a mineral-buildup remover product like CLR on your shower head. CLR quickly and easily dissolves and eliminates tough calcium and lime deposits and works on PVC showerheads.
Older sinks, tubs, and tiles may become etched by CLR. Avoid coming into contact with anything painted, coated, or sealed, including wood, clothing, wallpaper, carpet, natural stones, brass, copper, and aluminum. Immediately clean up spills.
To ensure that this product is compatible, always read the manufacturer’s instructions for the item you’ll be cleaning. Conscious shopping is always recommended.
In a well-ventilated area, mix equal amounts of CLR and warm water.
Test on a small patch of the glued area before applying to the entire surface and apply directly to the joint with a brush, cloth, or sponge and let soak for 2 minutes.
Try loosening the showerhead by hand gently twisting it until it comes off
Rinse the CLR off promptly with cold water.
Using Heat
Heat also works wonders in helping disconnect stuck connections through the concept of expansion and contraction.
To get it done you should use a heat gun to heat up the fitting whilst taking care not to apply excess heat or heat unevenly. You can also use a small hammer to tap the joint to loosen it up.
You shouldn’t then be able to unscrew the shower joint with a wrench or pair of pliers taking caution not to burn yourself.
If that doesn’t work, you can try heating the fitting again making sure the heat covers the female part of the joint, then pour some ice-cold water in the male connector. The expansion and contraction should help loosen things up and help you unscrew the head.
How to Remove a Shower Head that is Glued On
Normally, showerheads are not attached with glue but in some instances, you might find yourself in a situation where you have to deal with one.
Most adhesives used in plumbing are tough to deal with once dried and thus trying to remove the showerheads with force can damage it.
Thankfully, there are a few ingenious DIY methods you can apply to help you remove a glued shower head with a few easy steps, as covered below:
Twist Back and Forth with Gentle Force
This is a manual method that requires no tool. All you need is to apply pressure to the glued area until the glue begins to peel away.
This can be accomplished by gently but firmly twisting the shower head back and forth while attempting to extend the distance it unscrews each anticlockwise turn.
Remember that using excessive force may cause the showerhead to break.
Although this will not completely remove the glue, it will help loosen the connection, making it easier to try out other methods in the following step.
Use Hot Water and Lemon Juice
Hot water and lemon can be of great help in loosening up and trying to dissolve glue in glued connections.
- To begin, heat some water and add some lemon juice. You can also add a pinch of salt if you don’t have any on hand. Anyway, that’s the concoction.
- Fill a plastic bag halfway with the mixture and slowly wrap the bag around the shower head.
- Once the shower head has been completely immersed in the bag, use the rubber band to tighten the bag around the shower arm so the mixture does not spill.
- You can also use plumbing tape to secure the bag with the shower head inside.
- After soaking the shower head in the mixture for approximately 20 minutes, remove it from the mixture. The glue should be partially dissolved, making unscrewing the shower head much easier.
Using a Heat Gun
Heat can also be used to help detach glued connections by melting the adhesive, peeling it off, or using the expansion and contraction concept.
A heat gun can help you remove almost any adhesive, including glue, putty, grout, and flooring glue.
Begin by evenly heating the fitting using a heat gun, taking care not to overheat one side or apply too much heat.
Before the connection cools down, try unscrewing the showerhead by twisting it anticlockwise. For added leverage, try using a wrench or a pair of pliers.
Use Acetone or Nail Polish Remover
Acetone is an organic solvent that works effectively to remove glue and sticky residues. If you have nail polish remover at home, you can use that as well
Always begin by cleaning away any dirt or residue from the area with water and a cloth. All techniques work better on clean surfaces.
Soak a cleaning rag or cotton ball in pure acetone. If pure acetone isn’t handy, try nail polish remover. Press the rag or cotton against the glue until it dissolves. Wipe away thoroughly.
Try scraping it away with a putty knife or razor blade. Be careful with this tactic to avoid scratching or scuffing the metal. Try softening the glue first with a household all-purpose cleaner.
For a tougher alternative to acetone, experiment with denatured alcohol, lighter fluid, or hydrogen peroxide. Apply with a rag or cotton ball, hold to dissolve the glue, then wipe away.
How to Remove Shower Head Without a Wrench/Tools
If your shower head is in a good condition, all you need is your hands to unscrew and remove it. In fact, most are designed to be hand-tightened, and what you can tighten by hand you can usually loosen by hand.
However, there are cases where the shower head is not in a good condition, it is stuck it is extremely tight to remove but to make matters even worse you have no wrench or pliers. Following are a few ideas you can try to take out your shower head.
Using a Belt
A regular belt worn around the waist can be transformed into a surprisingly good recreation of the classic strap wrench. With the belt, you can generate some tension, but your leverage will be significantly reduced.
- Wrap the belt all around the base of the shower head at which it meets the pipe, with the end of the belt pointing in the opposite direction as the shower head connector. Normally, this indicates that the belt’s end is pointing clockwise.
- While tightening the loop around the pipe connector, detach the belt from the buckle.
- Pull the belt’s end so that it makes firm contact with the shower head.
- Wrap the belt around your wrist for added grip if necessary.
- Pull the belt counter-clockwise with firm but even pressure to loosen the threads.
- Once loose, finish unscrewing by hand till it detaches.
Using Duct Tape
Duct tape is also another great option to unscrew a shower head. Its strong adhesive grip and general strength enable you to use it to firmly grip the shower head and remove it.
- Tear off a 12- to 14-inch piece of tape, being careful not to let it stick to itself.
- Rip the tape strip down the middle to make two strips.
- Layer the two pieces of tape by sticking one to the non-sticky side of the other.
- To make this look perfect, wrap the duct tape in a crisscross pattern.
- Wrap the sticky side of the tape around the shower head in a counterclockwise rotation until there is about 6″ of tape left. If you require a longer tail to grip, wrap it less tightly or cut a longer piece of tape.
- When you’re finished with this. It’s time to use your strength to pull the showerhead while holding the other half of the duct tape.
- Firmly twist it in an anti-clockwise direction. You can now easily unscrew the shower head this way without using a wrench.
How to Remove shower Head without Scratching
To remove a shower head without scratching it, avoid using teethed adjustable wrenches or pliers. Your hands are enough to unscrew the shower head.
If you must use any tool, cover the fixture’s connector or plumbing nut with an old cloth to protect the metal. You can also tape the teeth of the pliers or wrenches with tape.
Tips to make Shower Head Removal Easy
Use Teflon tape to seal threads
When sealing threads on a shower head, you should consider using Teflon tape because it does a great job of making joints watertight and is easy to deal with.
The best part about using Teflon, in this case, is that as much as it’s perfect in sealing, it’s easy to work with and doesn’t give trouble when unscrewing connections.
Avoid gluing during installation
Gluing should be avoided during shower head installation. As noted previously in this text, glued connections are tough to separate and cause significant difficulty during removal.
The simplest approach to accomplish this is to choose a showerhead that fits correctly and does not require adhesive for sealing while also not leaking.
Dirt and mineral build-ups gradually form in the shower joints over time, hardening and making cleanup difficult.
To avoid this, it is best to inspect and check the connections for junk buildup on a regular basis, preferably once every couple of months, and remove it as needed.
Avoid excessive tightening during installation
You should avoid over-tightening the showerhead connection if possible. As much as this will make removal difficult, it may also damage the threads and pipes by applying excessive pressure.
Because most showerheads are meant to be tightened by hand, using sheer force is unnecessary. If you think you need to tighten the shower head further, only tighten it a quarter turn more using a wrench or pliers once the connection is hand tight.
Hard water is never ideal for practically any plumbing fixture because it gradually causes mineral buildup within pipes and other fixtures.
If you troubleshoot and discover that hard water is the primary cause of a stuck and clogged showerhead, it may be prudent to invest in a water softener or another method of softening the water.